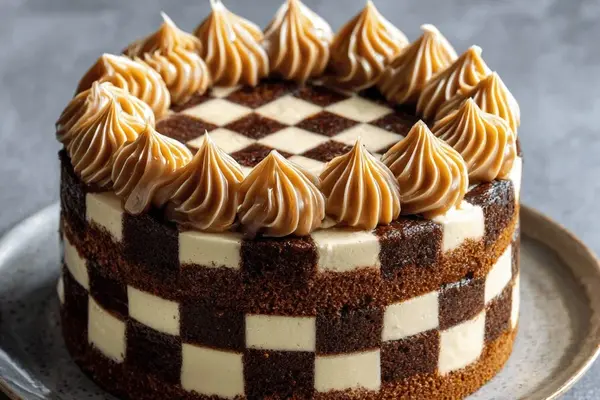
Checkerboard Cake with Caramel Filling
By Emma
Certified Culinary Professional
·
Recipe tested & approved
Chocolate batter and vanilla batter in separate pans — that’s just the start. The real trick is cutting them right, stacking them wrong on purpose, then reassembling the whole thing into a checkerboard pattern that actually works. Takes 1 hour 30 minutes total. Looks impossible. Isn’t.
Why You’ll Love This Checkerboard Cake
The pattern shows. Not hidden inside — visible from every angle, every slice. Makes a statement on a plate. Chocolate and vanilla in one bite. Not layered. Interlocked. Different texture because cocoa changes how the cake sets, so each square has its own thing going on. Caramel between every layer. Not just sweet. Burns a little, cuts sharp against the soft cake and buttercream. Frozen before slicing keeps the checkerboard tight. Warm cake is forgiving. Cold cake is architectural. You make it once and own it. Friends ask how you did it. Takes five minutes to explain. Looks like you trained for months.
What You Need for a Checkered Pattern Cake
Two loaf pans, roughly 22 by 12 centimeters — that’s the size constraint. Standard ones work fine. Heavy-bottomed pan for caramel because thin pans burn sugar unevenly.
Butter. Three-quarters cup for the caramel, plus another cup and three-quarters for the cake batter and frosting. Room temperature. Cold butter doesn’t cream right.
Sugar. Three-quarters cup for the caramel, then a cup and a quarter for the cake. Granulated. Powdered sugar goes into the frosting later.
Eggs. Four large ones. Cold eggs separate unevenly. Room temperature eggs trap air.
Vanilla extract. Real stuff. The imitation kind tastes like plastic once baked.
Flour. All-purpose. Two cups. Sift it with the baking powder or the cake comes dense.
Baking powder. Two teaspoons.
Cocoa powder. Three tablespoons unsweetened. Not Dutch process. Not sugar-dusted baking cocoa. Unsweetened. The cake part needs it, then more dusts the outside.
Milk. Any kind. Almond milk, regular milk, doesn’t matter. Just moisture. Cream too and the caramel breaks.
Heavy cream. Thirty-five percent fat minimum. The caramel needs it. Whipped cream is too airy. Doesn’t work.
Water. One-third cup total for the caramel. Half goes in with sugar, half stops the cooking.
Powdered sugar. Two cups for frosting. Sift it or the frosting tastes grainy.
How to Make a Checkerboard Cake Design
Start with the caramel because it needs to cool. Pour sugar and half the water into a heavy pan. No stirring yet. Medium heat. Just swirl it. Watch the edges first — they clear up, then go amber, then brown. Smell shifts. That’s your cue. When it’s deep amber with brown edges creeping in, pull it off. Don’t wait for the whole pan. Off heat now.
Add the rest of the water slowly. It bubbles violently. Weird. Normal. Add the cream. Stir just enough to combine. Back on low heat for a second if it’s too thick. It’ll thicken as it cools. Set it aside. Don’t touch it.
Preheat to 350 degrees Fahrenheit. Grease and flour the loaf pans.
Beat butter and sugar until it’s pale and creamy. Four to five minutes. This traps air. Skip this and the cake stays dense. Add eggs one at a time. Wait after each one. Mix in vanilla. Combine the flour and baking powder separately — sift them. Alternate adding dry mix and milk to the butter mixture. Flour first, milk, flour, milk, flour last. Fold gently. Don’t overmix. Overmixing toughens it.
Split the batter in half. Into one half, fold cocoa powder plus extra milk until it goes dark. Rich chocolate smell. That’s the sign it’s evenly mixed.
Chocolate batter in one pan, vanilla in the other. Smooth the tops. Bake for 35 to 40 minutes. Center rack. Test with a toothpick. Comes out clean or with a few crumbs. Not wet. Not dry.
Cool 15 minutes. Invert onto racks. Trim the domed tops with a serrated knife — need flat surfaces. Once cool, slice each cake horizontally. Two layers per cake. Four rounds total. Two chocolate, two vanilla.
How to Get the Checkered Pattern Right
This is where it gets specific. Layer the four rounds alternating colors. Chocolate, vanilla, chocolate, vanilla. Between each layer, spread caramel. Thin layer. Not soaked. Cake holds together but it’s moist.
Once stacked and caramel-glued, the cake is now a block. Square off the edges with a serrated knife for neatness. Freeze it. Cold cake is rigid. Warm cake is forgiving and cuts messy.
Cut vertically into three long strips. You get three slices. Each slice shows the checkerboard — vanilla segments interlocked with chocolate segments down the length. That’s the pattern.
Take one slice. Lay it flat. Spread caramel on top. Stack the other slices on top, but rotate each one so the checkerboard pattern rotates with it. The second slice goes opposite the first. The third aligns back with the first. They fuse as they sit together.
Beat the softened butter until creamy. About three minutes. Sift in powdered sugar gradually. Low speed or you get a cloud. Beat on high for a moment just to aerate it. No gritty bits. Cover and chill if it’s too soft.
Spread the buttercream over the entire cake. Sides, top, everything. Optional: tint a small portion with pastel food coloring and swirl it on top for a marbled look. Some people do this. Some don’t.
Chill slightly. Dust the sides with cocoa powder for a rustic finish. The checkerboard cake is now complete.
Checkered Cake Design Tips and Mistakes
The caramel seizing is real. If you add cold cream to hot caramel, it clumps. Warm your cream first or add it slowly. Actually, add it slowly no matter what. Expectation helps.
Overmixing the batter makes the cake tough. Fold gently. You should see streaks of cocoa in the chocolate batter. That’s fine. Mix it more and the gluten overdevelops. Dense cake.
Freezing is not optional. Room temperature cake wobbles. The pattern stays crisp in frozen cake. Let it thaw 10 minutes before serving. Still cold. Structure holds.
Trimming the dome is crucial. Flat surfaces stack cleanly. Domed surfaces mean uneven layers. The checkerboard falls apart. It’s not complicated.
The caramel between layers shouldn’t soak the cake. Thin layer. Just enough to glue. Thick layer means soggy cake. It falls apart when you cut it.
Cutting the checkerboard requires a sharp serrated knife and a single motion downward. Saw through don’t zigzag. Zigzag crumbles the edges.
The third dimension matters. Most checkerboard cakes are just squares viewed from above. This one is checkerboard from the side. The rotation of slices creates it. Don’t skip the rotation step.
Some people use a checkerboard cake pan. Specially molded. Different technique. This method works without special equipment. Loaf pans and a knife. That’s all.
Checkerboard Cake with Caramel Filling
Prep:
50 min
Cook:
40 min
Total:
1h 30min
Servings:
8 servings
Ingredients
- Caramel
- 180 ml (3/4 cup) granulated sugar
- 75 ml (1/3 cup) water (divided)
- 120 ml (1/2 cup) heavy cream 35%
- Frosting
- 175 ml (3/4 cup) unsalted butter, softened
- 480 ml (2 cups) powdered sugar
- 5 ml (1 tsp) white vanilla extract
- Cake
- 240 ml (1 cup) unsalted butter, softened
- 295 ml (1 1/4 cup) granulated sugar
- 4 large eggs
- 10 ml (2 tsp) pure vanilla extract
- 500 ml (2 cups) all-purpose flour
- 10 ml (2 tsp) baking powder
- 60 ml (1/4 cup) almond milk (or regular milk)
- 50 ml (3 tbsp) unsweetened cocoa powder
- 40 ml (2 1/2 tbsp) almond milk (or regular milk) extra
- Cocoa powder for dusting
Method
- Caramel
- 1 Pour sugar and half the water into a heavy-bottomed pan over medium heat. No stirring — just swirl gently. Watch the color shift: first clear, then amber then deep golden caramel scent wafts. When deep amber with brown edges, pull off heat fast.
- 2 Carefully add remaining water and warm cream — expect vigorous bubbling, steam. Stir gently, return saucepan on low just to combine. Don’t boil or it will seize. Set aside to cool completely. Caramel should be pourable but thick.
- Frosting
- 3 Beat softened butter in large bowl on medium speed until creamy and lightened, about 3 minutes. Gradually sift powdered sugar, continue beating low speed to avoid clouds.
- 4 Add vanilla. Increase speed to high momentarily to aerate — frosting must be fluffy yet holding shape, no gritty sugar bits. Cover and chill if too soft when assembling.
- Cake
- 5 Preheat oven to 175°C (350°F). Grease and flour two loaf pans roughly 22 x 12 cm (9 x 5 in).
- 6 In large bowl, beat butter and sugar until pale, creamy — 4–5 minutes; crucial to trap air otherwise cake dense. Add eggs one at a time, beating well after each. Mix in vanilla extract fully.
- 7 In separate bowl, sift flour and baking powder together. Alternate adding dry mix and almond milk to butter-egg mix, beginning and ending with flour. Fold gently with spatula, don’t overmix — batter silky, thick but flowing.
- 8 Divide batter evenly. To one half, fold in cocoa powder plus extra almond milk just until fully dark and uniform. Rich chocolate scent should bloom.
- 9 Pour chocolate batter into one pan and vanilla into the other, smooth tops with spatula. Bake center rack 35–40 minutes, test doneness with toothpick — comes out clean or with few crumbs.
- 10 Let cool 15 minutes, then invert onto racks. Trim domed tops with serrated knife for flat surfaces. Once fully cool, slice horizontally into two layers each, yielding four total cake rounds (2 vanilla, 2 chocolate).
- 11 Layer cakes alternating vanilla and chocolate rings. Spread a thin layer of caramel between each layer to glue. Don’t oversoak or cake soggy. Square off edges for neatness.
- 12 Cut these layered rounds vertically into three long strips. You'll get three checkerboard slices alternating vanilla and chocolate segments lined up.
- 13 Lay one slice flat. Spread caramel evenly atop. Stack other slices alternating colors to form checkerboard pattern when viewed from side. Press gently to fuse.
- 14 Spread buttercream frosting evenly over entire cake. Optionally tint a small portion with pastel food coloring and swirl lightly on top to mimic a subtle marbled effect.
- 15 Chill slightly to set frosting. Dust sides lightly with cocoa powder for rustic finish.
Nutritional information
Calories
480
Protein
5g
Carbs
55g
Fat
28g
Frequently Asked Questions About Checkerboard Cake
Can I make the checkerboard cake ahead? Yes. Bake the cakes, cool them, freeze them. Slice and reassemble the day you want to frost it. Actually better. Cold cake holds the pattern tighter when you’re working with it.
What if my caramel turns dark brown too fast? It happens. Next time use medium-low heat instead of medium. Caramel can go from golden to burnt in seconds on high heat. The smell changes right before it burns. Trust the smell.
Do I have to use caramel as the filling? No. Buttercream works. Ganache works. But caramel is sharp. Cuts through the sweetness of vanilla and chocolate. Other fillings are safer. Less interesting but safer.
How thick should the cake layers be when I slice them? Not too thin or they crumble. Not too thick or the checkerboard pattern gets subtle. Maybe quarter-inch thick per layer. Serrated knife, cold cake, one motion down. Works every time.
Can I make this as a regular round cake instead of loaves? Technically yes. Round pans are trickier. You’d need to slice concentric circles and rotate them. More pieces. More complicated to reassemble. Loaf pans give you the long straight slices. Easier. Better result.
Why do you need to freeze the stacked cake before slicing it again? Warm cake is soft. The layers shift when you cut. Cold cake is rigid. The checkerboard pattern holds. Also, cold cake doesn’t crumble at the edges the way room-temperature cake does. The glue — your caramel — sets solid when cold.
What if the pattern doesn’t show clearly from the side? Rotation. The three slices have to rotate relative to each other or the pattern is flat. Stack them straight up and it’s just horizontal layers. Rotate each slice 90 degrees and the checkerboard appears. It’s the rotation that creates it.
Can I skip the cocoa dusting at the end? Yeah. It’s rustic. Looks unfinished without it. Up to you.
You’ll Love These Too
Explore all →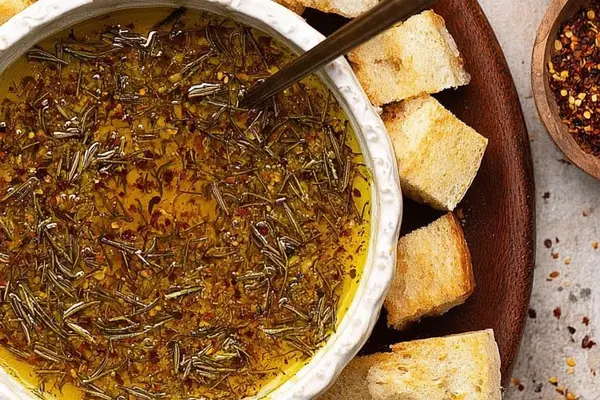
Olive Oil for Dipping Bread Recipe
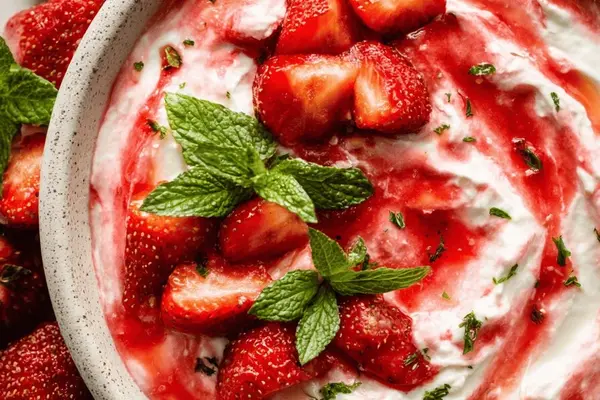
Greek Yogurt Strawberry Dip with Lemon
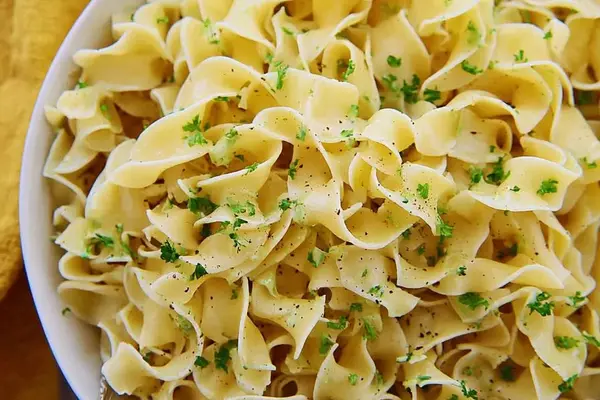
Buttered Noodles Recipe with Smoked Paprika
Slow Cooker White Chicken Chili Recipe
Banana Foster French Toast with Dark Chocolate
Cherry Chip Cake with Orange Zest & Pecans
Grilled Beef Sandwiches With Pickled Fennel
Unsweetened Coconut Juice with Soybeans
Mint Chocolate Brownies with Ganache
Cajun Shrimp Pasta with Roasted Red Pepper
Kale Salad with Bulgur, Blueberries & Pecans
Grapefruit Loaf Cake with Cardamom
Cream Cheese Swirl Brownies Recipe
Amaretto Peanut Butter Pie Recipe No Bake
Crunchy PB Chocolate Balls No-Bake
Roast Lamb Dinner with Garlic and Sage
White SOS: Béchamel Sauce with Olive Oil
Carrot Cake Muffins with Cream Cheese
Roast Chicken with Carrots, Beets & Cherry Tomatoes